I struggle to remember how to deploy an InfoPath 2007 form to SharePoint when it is a browser version. So here's the deal.
Create the InfoPath form and make sure the compatibility is set for browser version and that you make the form Fully Trusted and sign it with a digital certificate.
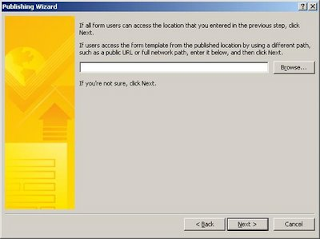
Now publish to form to a network location - its a temporary location and you can make it a local directory if you want. But when prompted to provide an alternate name for the form, leave this blank.
Create the InfoPath form and make sure the compatibility is set for browser version and that you make the form Fully Trusted and sign it with a digital certificate.
Now publish to form to a network location - its a temporary location and you can make it a local directory if you want. But when prompted to provide an alternate name for the form, leave this blank.
Now go to Central Administration and Application Centre and then select Upload Form template under InfoPath Form Services.
On the screen click Browse and navigate to where you uploaded the InfoPath template to. Click Verify and check for errors, if OK, then use Upload to upload the form template.
Go to Manage Form Templates and wait for the form to be installed and then right click and activate it to a site collection. What happens is the form is copied to the Form Template document library of the site collection (use View Site Content on the site collection in question to see the Form Templates library). It also adds the for as a site content type.
So now go to the top site of the site collection, choose Site Actions and Site Content Types. Scroll down the screen until you see the Content Type under Form Content types.
If you go to a Form Library and set it for supporting content types, you will be able to add en existing content type and then add the new form template.
If you go back to the Form Library and select New you should see the new Form type under the list. That will open the form template in the browser window.
So how is this different when the form has managed "code behind"? Answer: it's the same. In the case of an InfoPath form with managed code, you would create a Visual Studio project as an InfoPath form template and use your XSN as the source form. You will need to have installed the Office 2007 Visual Studio templates. Click on the Manifest.XSF to Open the form. The FormCode.cs has the code behind. From the Project menu you will be able to Build and then Publish the form. The same wizard is displayed and you would publish to a local directory leaving the laternate name of the form blank. The DLL that is created with the form is embedded in the XSN. Upload the form template in the same way.